JavaScript Parsers: Overview of Features
JavaScript parsers provide the ability to create your own full-featured parsers with any level of logic complexity using the JavaScript language. At the same time, JS parsers can also utilize all the functionality of standard parsers.
Features
Using the full power of A-Parser, you can now write your own parser/regger/poster with any level of logic complexity. JavaScript with ES6 capabilities (v8 engine) is used for writing code.
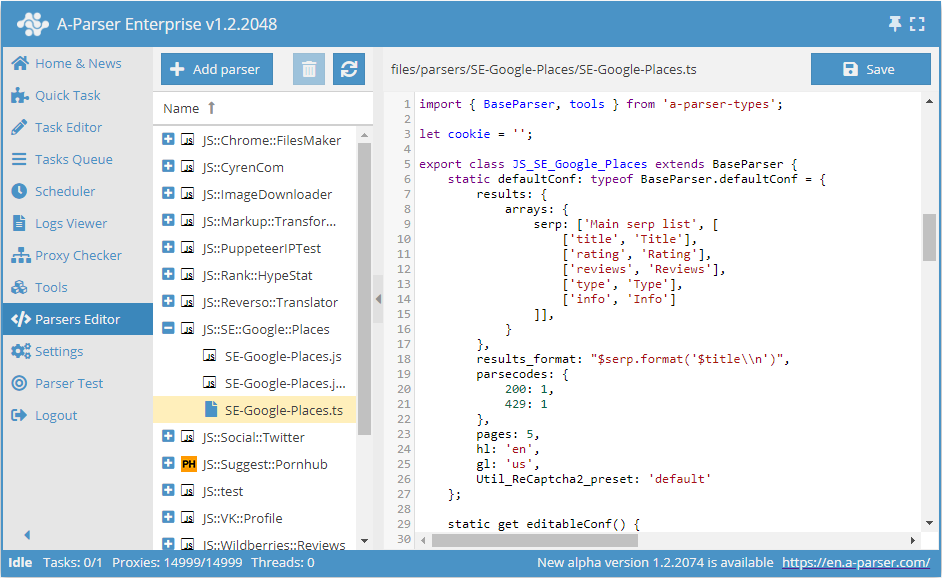
The parser code is as concise as possible, allowing you to focus on writing logic; A-Parser handles multithreading, networking, proxies, results, logs, etc. Code can be written directly in the parser interface by adding a new parser in the Parser Editor. You can also use third-party editors, such as VSCode, to write parsers.
Automatic versioning is used when saving parser code through the built-in editor.
Working with JavaScript parsers is available for Pro and Enterprise licenses.
Access to the JS Parser Editor
If A-Parser is used remotely, the JS Parser Editor is not available by default for security reasons. To enable access to it, you must:
- Set a password in the Settings tab -> Global Settings
- Add the following line to config/config.txt:
allow_javascript_editor: 1 - Restart A-Parser
Instructions for use
In the Parser Editor, create a new parser and specify the parser name. By default, a simple example will be loaded, based on which you can quickly start creating your own parser.
If a third-party editor is used for writing code, you need to open the file of the edited parser in the /parsers/ folder. File structure of the installed program.
When the code is ready, save it and use it like a regular parser: in the Task Editor, select the created parser; if necessary, you can set the required parameters, thread config, filename, etc.
The created parser can be edited at any time. All changes regarding the interface will appear after re-selecting the parser in the parser list or restarting A-Parser; changes in the parser logic are applied when the task with the parser is restarted.
A standard icon is displayed by default for each created parser; you can add your own in png or ico format by placing it in the parser folder in /parsers/:

General principles of operation
By default, an example of a simple parser is created, ready for further editing.
- TypeScript
- JavaScript
import { BaseParser } from 'a-parser-types';

export class JS_v2_example extends BaseParser {
    static defaultConf: typeof BaseParser.defaultConf = {
        version: '0.0.1',
        results: {
            flat: [
                ['title', 'HTML title'],
            ]
        },
        max_size: 2 * 1024 * 1024,
        parsecodes: {
            200: 1,
        },
        results_format: '$query: $title\\n',
    };

    static editableConf: typeof BaseParser.editableConf = [];

    async parse(set, results) {
        this.logger.put("Start scraping query: " + set.query);

        let response = await this.request('GET', set.query, {}, {
            check_content: ['<\/html>'],
            decode: 'auto-html',
        });

        if (response.success) {
            let matches = response.data.match(/<title>(.*?)<\/title>/i);
            if (matches)
                results.title = matches[1];
        }

        results.success = response.success;

        return results;
    }
}
const { BaseParser } = require("a-parser-types");

class JS_v2_example_js extends BaseParser {
    static defaultConf = {
        version: '0.0.1',
        results: {
            flat: [
                ['title', 'HTML title'],
            ]
        },
        max_size: 2 * 1024 * 1024,
        parsecodes: {
            200: 1,
        },
        results_format: '$query: $title\\n',
    };

    static editableConf = [];

    async parse(set, results) {
        this.logger.put("Start scraping query: " + set.query);

        let response = await this.request('GET', set.query, {}, {
            check_content: ['<\/html>'],
            decode: 'auto-html',
         });

        if (response.success) {
            let matches = response.data.match(/<title>(.*?)<\/title>/i);
            if (matches)
                results.title = matches[1];
        }

        results.success = response.success;

        return results;
    }
}
The constructor is called once for each task. It is mandatory to set this.defaultConf.results and this.defaultConf.results_format; other fields are optional and will take default values.
The this.editableConf array defines which settings can be changed by the user from the A-Parser interface. You can use the following field types:
combobox- a dropdown selection menu. You can also create a selection menu for a standard parser preset, for example:
['Util_AntiGate_preset', ['combobox', 'AntiGate preset']]
comboboxwith multi-select capability. You need to additionally set the{'multiSelect': 1}parameter:
['proxyCheckers', ['combobox', 'Proxy Checkers', {'multiSelect': 1}, ['*', 'All']]]
checkbox- a checkbox for parameters that can only have 2 values (true/false)textfield- a text fieldtextarea- a text field with multi-line input
The parse method is an asynchronous function and must return await for any blocking operation (this is the main and only difference from a regular function). The method is called for each query received for processing. set (a hash with the query and its parameters) and results (an empty template for results) are passed mandatorily. It is also mandatory to return the filled results, having previously set the success flag.
Automatic versioning
The version has the format Major.Minor.Revision
- TypeScript
- JavaScript
this.defaultConf: typeof BaseParser.defaultConf = {
    version: '0.1.1',
    ...
}
this.defaultConf = {
    version: '0.1.1',
    ...
}
The Revision value (the last digit) is automatically incremented with each save. Other values (Major, Minor) can be changed manually, and the Revision can also be reset to 0.
If for some reason it is necessary to change the Revision only manually, the version must be enclosed in double quotes ""
Bulk query processing
In some cases, it may be necessary to take several queries from the queue at once and process them in one go. This mode is used in built-in parsers when data for several keys needs to be requested in one pass (as a batch).
To implement the same functionality in a JS parser, you need to set the value bulkQueries: N in this.defaultConf, where N is the required number of queries in the batch. In this case, the parser will take queries in batches of N pieces, and all queries of the current iteration will be contained in the set.bulkQueries array (including all standard variables: query.first, query.orig, query.prev, etc.). Below is an example of such an array:
[
    {
        "first": "test",
        "prev": "",
        "lvl": 0,
        "num": 0,
        "query": "test",
        "queryUid": "6eb301",
        "orig": "test"
    },
    {
        "first": "check",
        "prev": "",
        "lvl": 0,
        "num": 1,
        "query": "check",
        "queryUid": "774563",
        "orig": "check"
    },
    {
        "first": "third query",
        "prev": "",
        "lvl": 0,
        "num": 2,
        "query": "third query",
        "queryUid": "2bc8ed",
        "orig": "third query"
    }
]
Results during bulk processing must be filled in the results.bulkResults array, where each element is a results object. Elements in results.bulkResults are arranged in the same order as they were in set.bulkQueries.
Useful links
📄️ bulkQueries Example
Example of using bulkQueries with a built-in parser call
🔗 Examples and Discussion
Forum thread with examples and discussion of JS parser functionality
🔗 JS Parser Catalog
Section in the resource catalog dedicated to JS parsers
🔗 Overview of Basic ES6 Features
Article on habrahabr dedicated to an overview of basic ES6 features