Proxy Settings
In most cases, the high-quality performance of A-Parser relies on working with proxies; therefore, A-Parser features first-class support for proxies of various types and configurations, and also supports simultaneous operation with several different proxy sources, both within a single task and separated by type between different tasks.
Main A-Parser features for working with proxies:
- Simultaneous support for HTTP, SOCKS4, and SOCKS5 proxies
- Multi-threaded proxy checking
- Loading proxies from a local file
- Multi-threaded loading from external sources
- Anonymity checking
- Support for login/password authorization for both HTTP and SOCKS5 proxies, as well as support for various authorization data in
login:password@ip:portformat - Ability to set custom regular expressions for proxy IP address and port when parsing from external sources
- Ability to export checked proxies to a file
- Ability to use multiple proxy sources in one task
- Support for domain proxies in
domain:portandlogin:pass@domain:portformats
Management
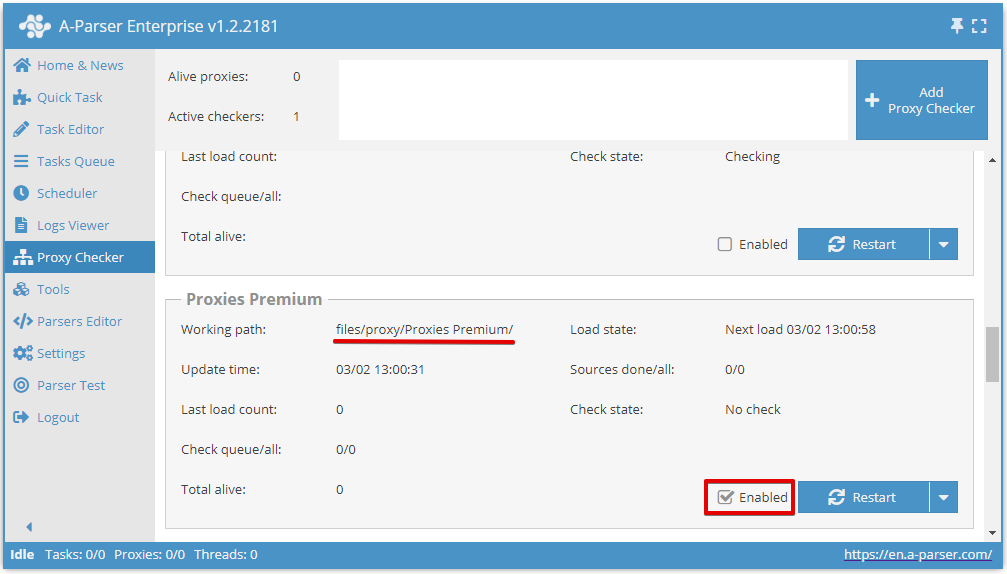
Proxy checkers are managed in the Proxy Checker tab, where you can add, delete, as well as enable and disable proxy checkers. This tab also displays performance statistics for each proxy checker, a graph of alive proxies, and statistics on source processing.
Proxy settings from Members Area
Proxy Unlimited (regular proxies)
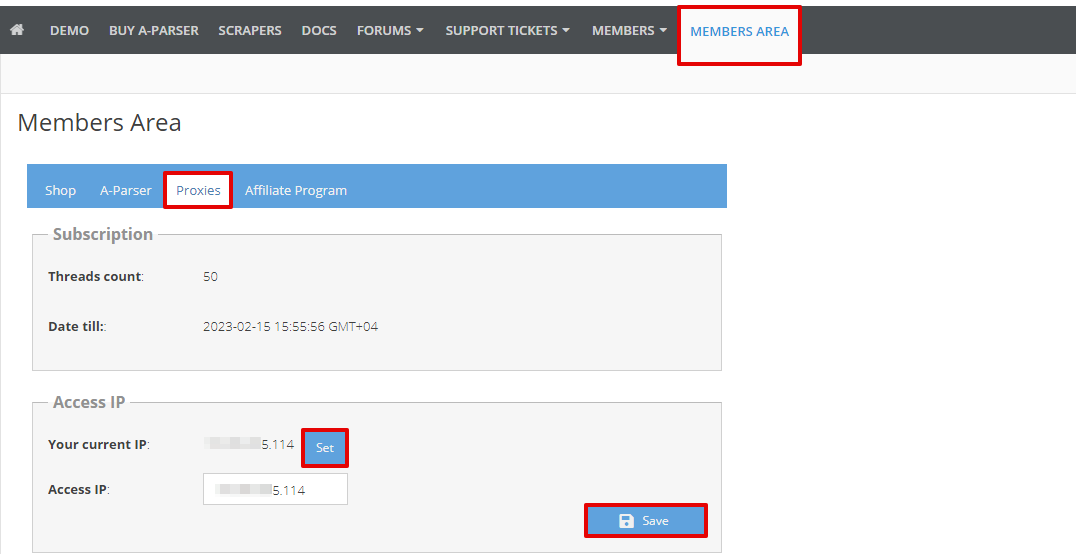
To use Unlimited proxies from A-Parser, you need to go to the Members Area, navigate to the Proxies tab, click the Use IP button, and then the Save button.
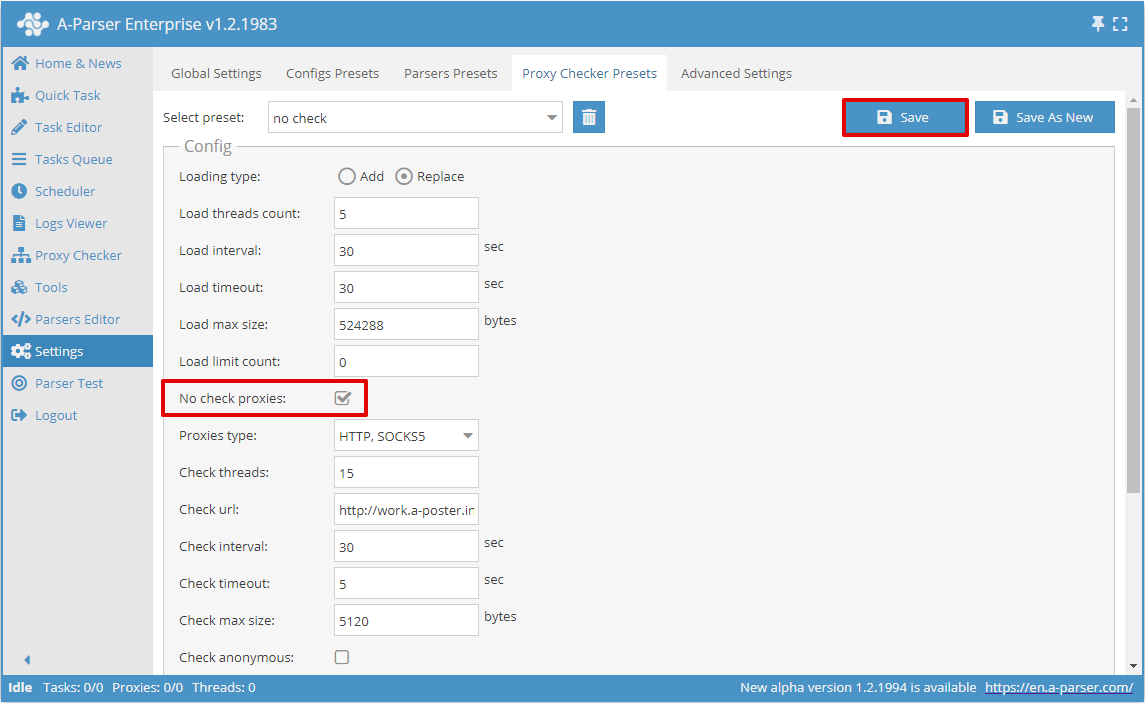
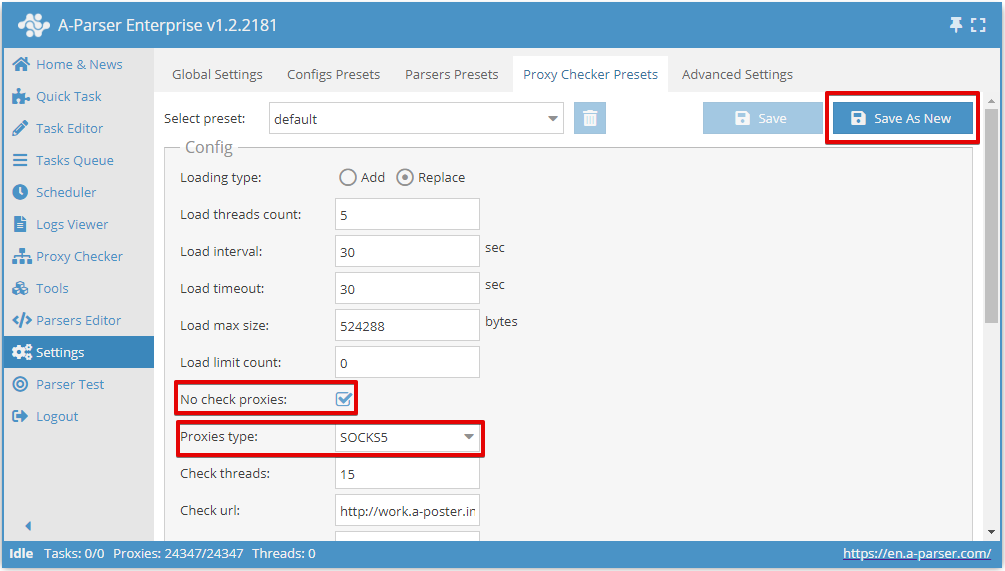
Next, add a proxy checker. It is sufficient to disable proxy checking (check the box next to the No check proxies option); other settings can be left at their defaults. Save the proxy checker: for existing ones, click the Save button; for new ones, click Add new.
Return to the Proxy Checker menu and check if the newly created checker is enabled; if not, enable it.
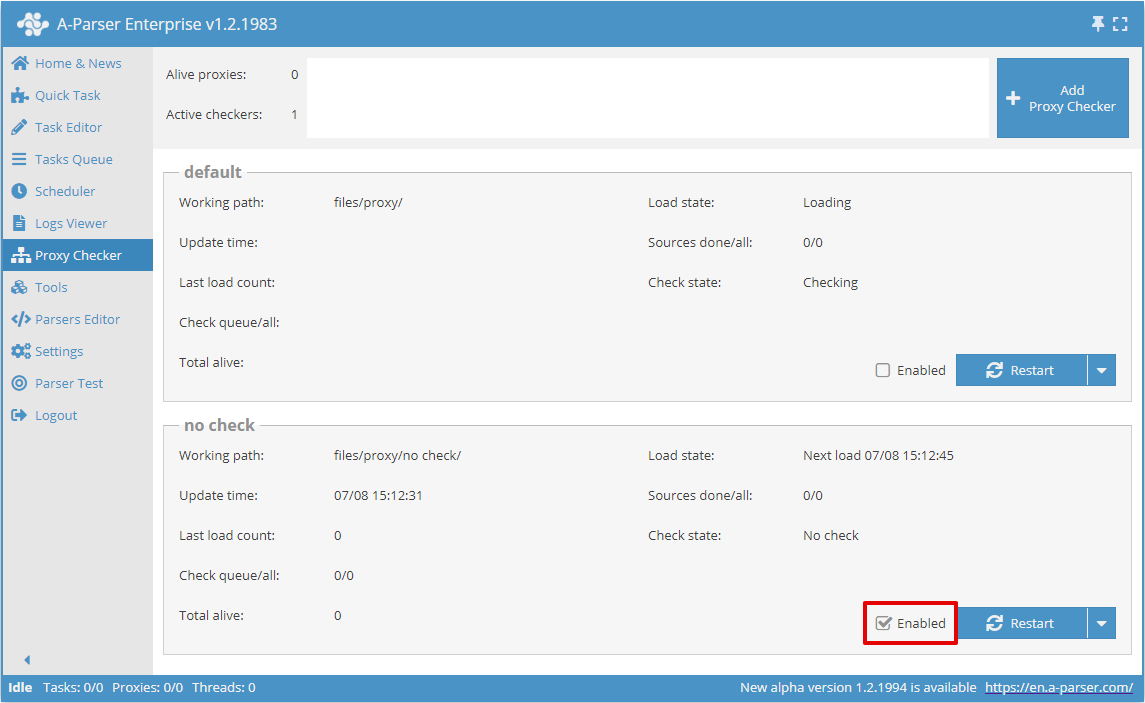
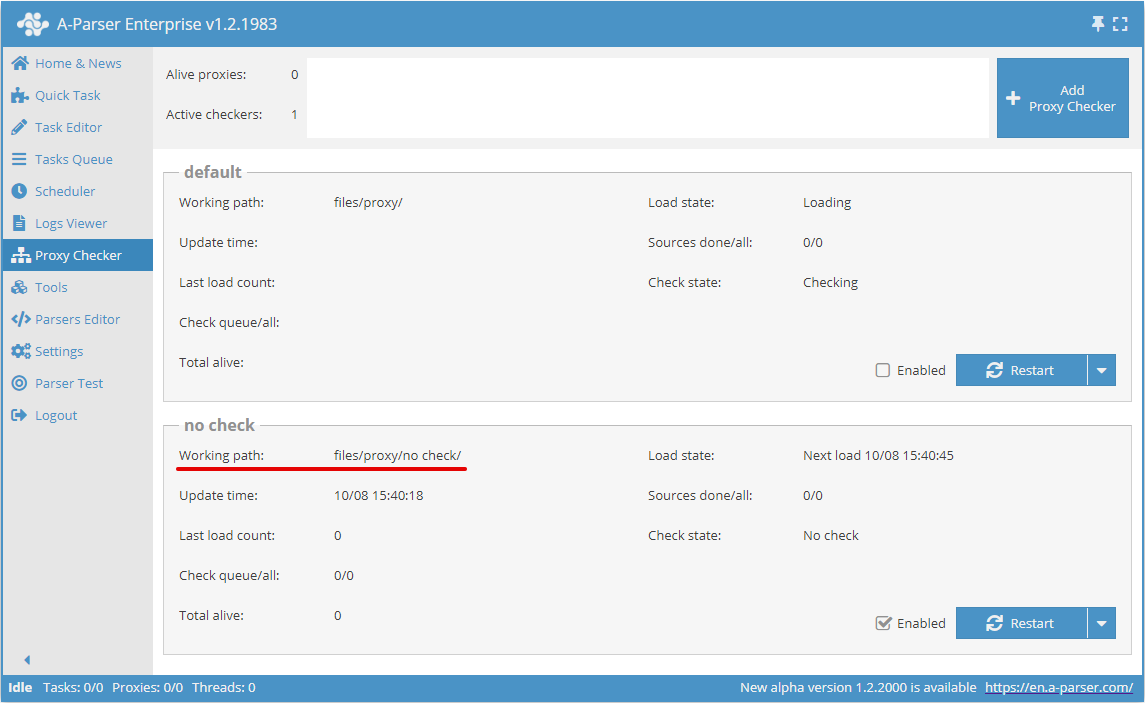
Open the proxy checker directory specified in the Working path field.
Copy 1 link to the proxy list from the Members Area and specify it in the sites.txt of the created proxy checker.
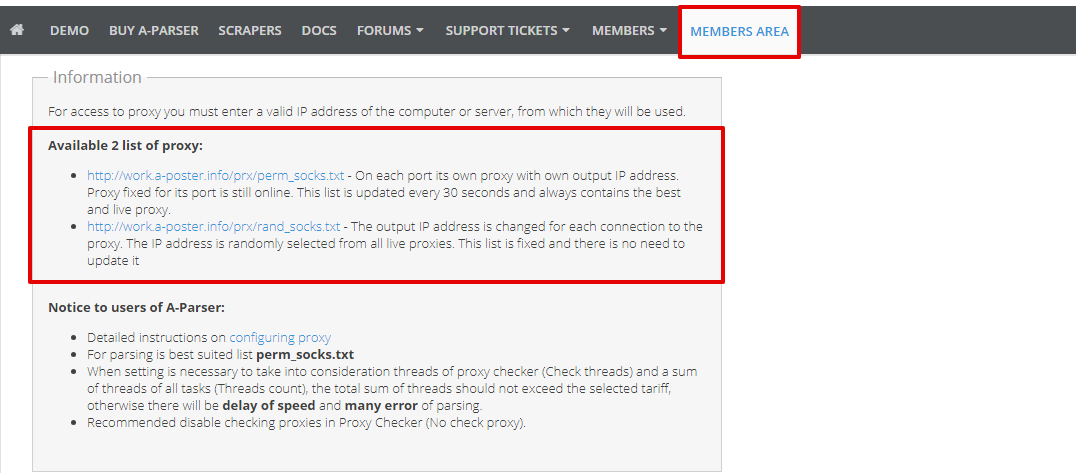
- http://work.a-poster.info/prx/perm_socks.txt - Each port has its own proxy with its own outgoing IP address. The proxy is fixed to its port as long as it remains online. This list is updated every 30 seconds and always contains current and alive proxies. Recommended for most tasks.
- http://work.a-poster.info/prx/rand_socks.txt - The outgoing IP address changes for each connection to the proxy. The IP address is selected randomly from all alive proxies. This list is fixed, and there is no need to update it.
Return to A-Parser, to the Proxy Checker menu for the created proxy checker. The "Total alive" field for this proxy checker should be greater than 0 — this means the proxies are configured correctly.
Proxy Premium
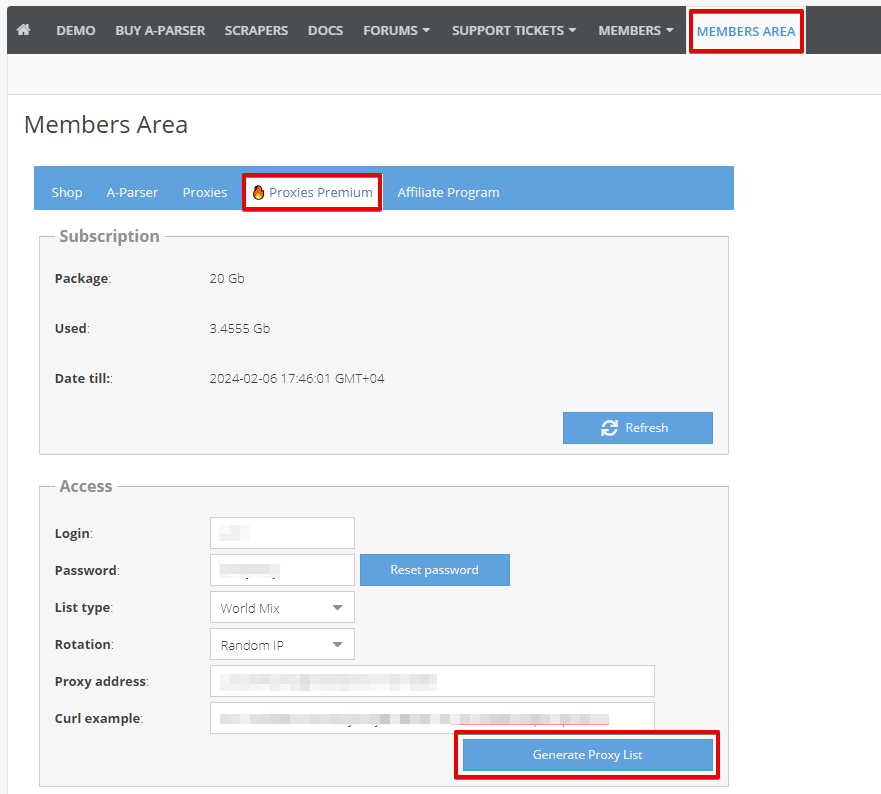
To use Premium proxies from A-Parser, you need to go to the Members Area, navigate to the Proxies Premium tab, and generate a link to the proxies with the required parameters.
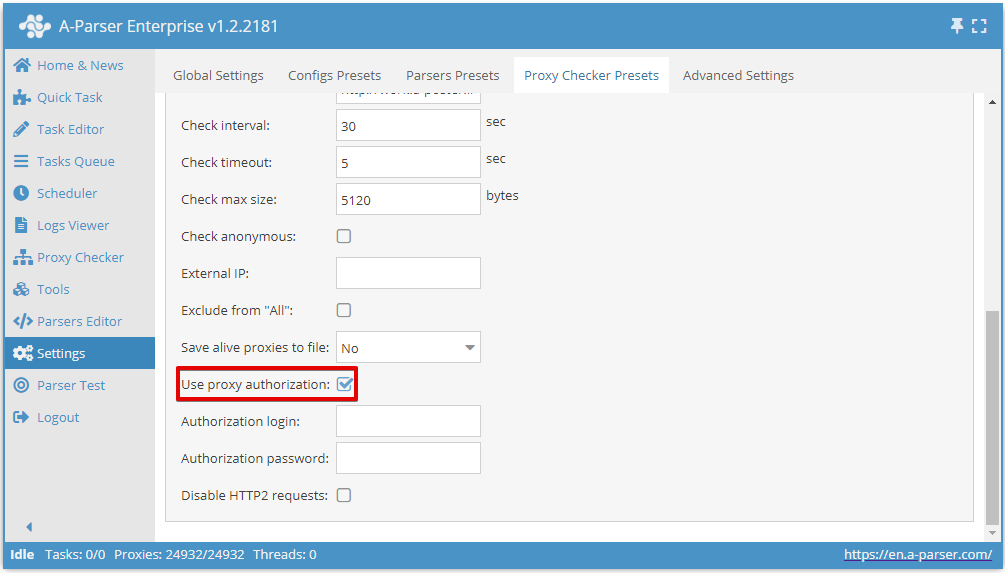
Next, add a proxy checker. You need to disable proxy checking (check the box next to the No check proxies option), select SOCKS5 in the Proxy type field, and enable proxy authorization (check the box next to the Use proxy authorization option). Other settings can be left at their defaults. Save the proxy checker: for existing ones, click the Save button; for new ones, click Add new.
Return to the Proxy Checker menu. Check if the newly created checker is enabled; if not, enable it. After that, open the proxy checker directory specified in the Working path field.
Paste the proxy link generated in the Members Area into the sites.txt file of the created proxy checker and save it.
Return to A-Parser, to the Proxy Checker menu for the created proxy checker. The "Total alive" field for this proxy checker should be greater than 0 — this means the proxies are configured correctly.

Format
To set the required proxy format, you need to add parameters to the proxy link in the desired sequence (format is arbitrary).
Example of login:password:ip:port format - &format=login:password:host:port, the proxy link will look as follows: https://proxifyr.com/proxyList?login=12345&password=12345&type=mix&rotation=10&format=login:password:host:port
Detailed proxy configuration
More details about proxy checkers and other proxy configuration options can be found in the Proxy Checkers section.