Captcha Bypass
A-Parser does not solve captchas on its own. To bypass captchas, A-Parser uses proxies and captcha solving services.
Depending on the captcha type, the following online services are supported:
- RuCaptcha
- Anti-Captcha
- 2captcha
- CapMonster
- CapMonster cloud
- CapSolver
- captchas.io
- cap.guru
- White captcha
- Capsola
- Nextcaptcha
And offline software - XEvil, CapMonster.
To work with captcha solving services, A-Parser has five built-in parsers:
 Util::AntiGate - solves image captchas containing letters/numbers/words
 Util::ReCaptcha2 - solves Google ReCaptcha v2
 Util::ReCaptcha3 - solves Google ReCaptcha v3
 Util::hCaptcha - solves hCaptcha captchas
 Util::Turnstile - solves Cloudflare Turnstile captchas
It is important to understand that captcha recognition settings are defined in a separate parser and then used in others. That is, we configure one parser and use its settings as the settings for an option in another. This makes it possible to have different settings for different services or captcha solving programs simultaneously.
The following describes how to configure each parser to work with captcha solving services.
Settings
All captcha solving parsers are configured similarly; the configuration below is shown using Util::AntiGate as an example.
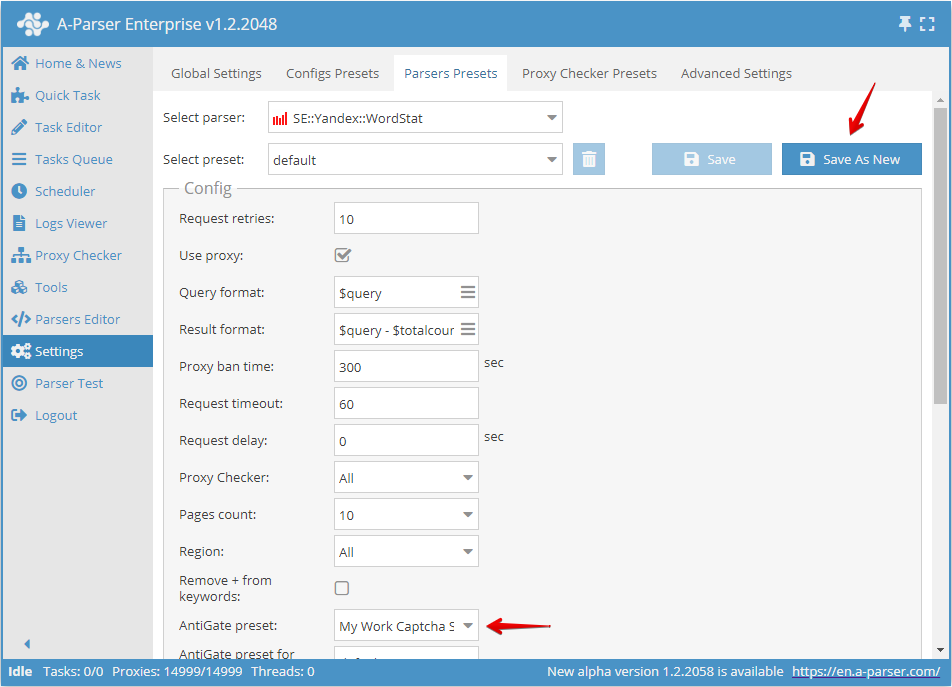
Setting up the captcha parser preset
Open Settings and then open Parser settings.
Select the Util::AntiGate parser from the dropdown list.
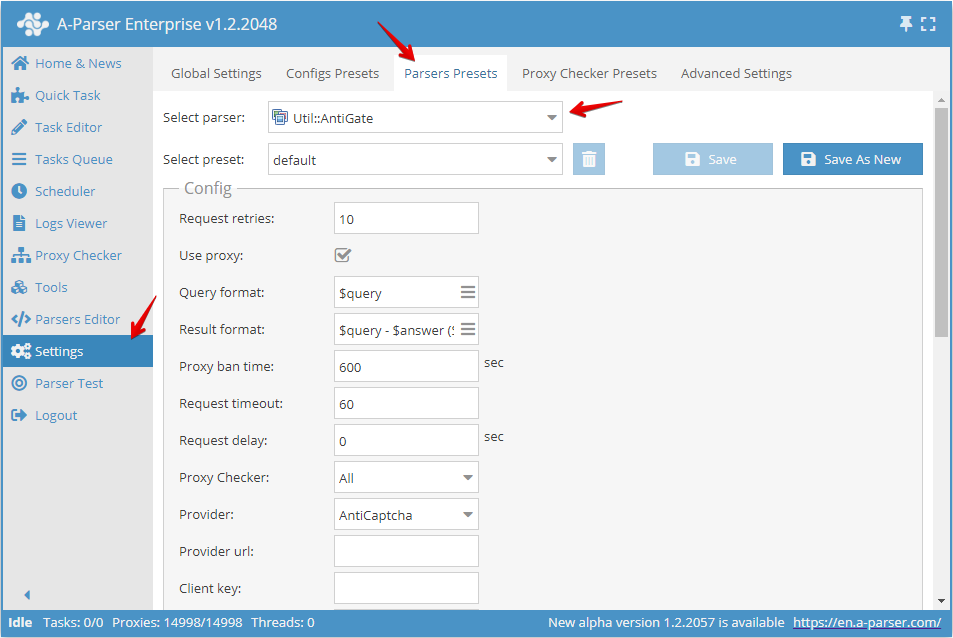
Next, you need to:
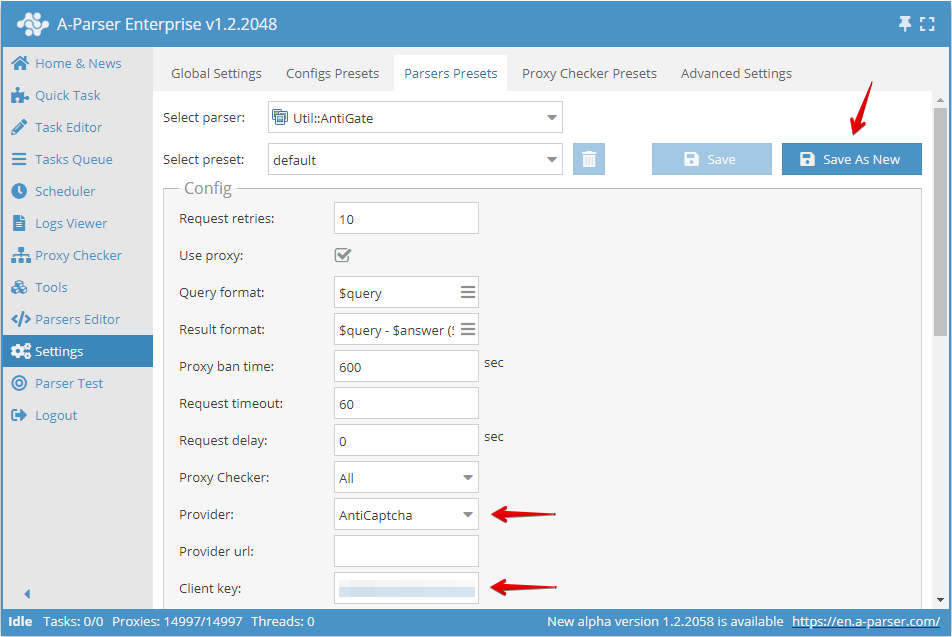
- Select the required Provider.
- The parser automatically uses the correct URL of the selected service, but if necessary, it can be overridden in the Provider url field.
- If required by the selected service, the access key can be specified in Client key.
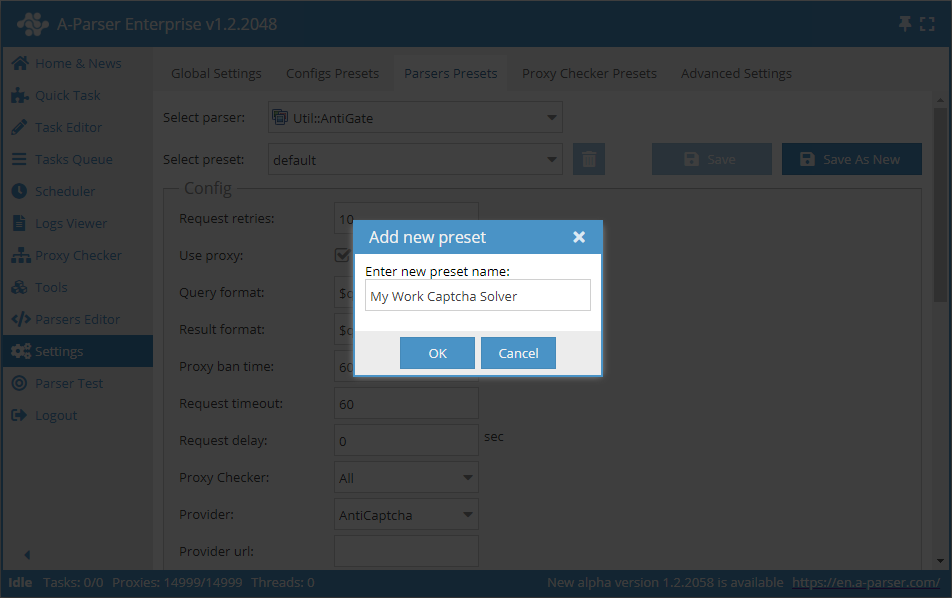
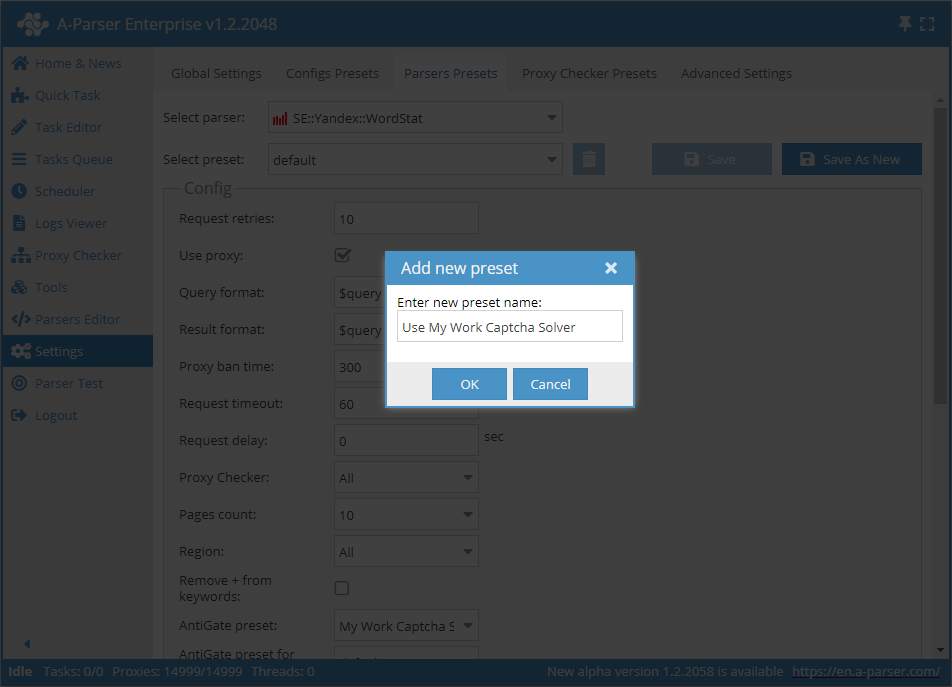
After that, save the settings as a new preset and enter a name (in the example, it is named My Work Captcha Solver).
Connecting to the selected parser via redefinition
After configuring the captcha parser preset, it will be sufficient to select it via the overriding settings function.
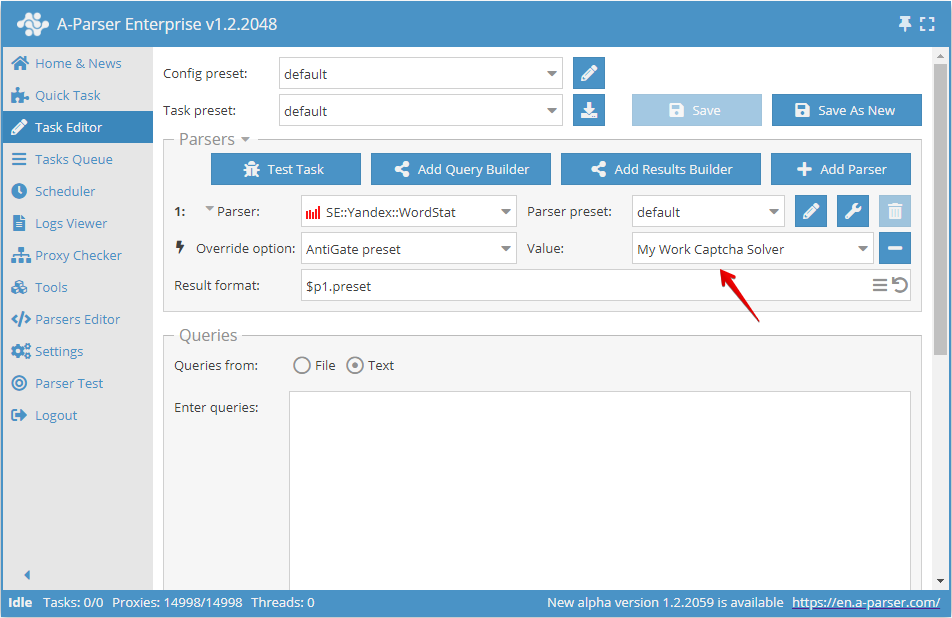
Connecting to the selected parser via preset settings
Go to the Task Editor and select the parser in which you will use AntiGate, for example  SE::Yandex::WordStat.
Go to its settings.
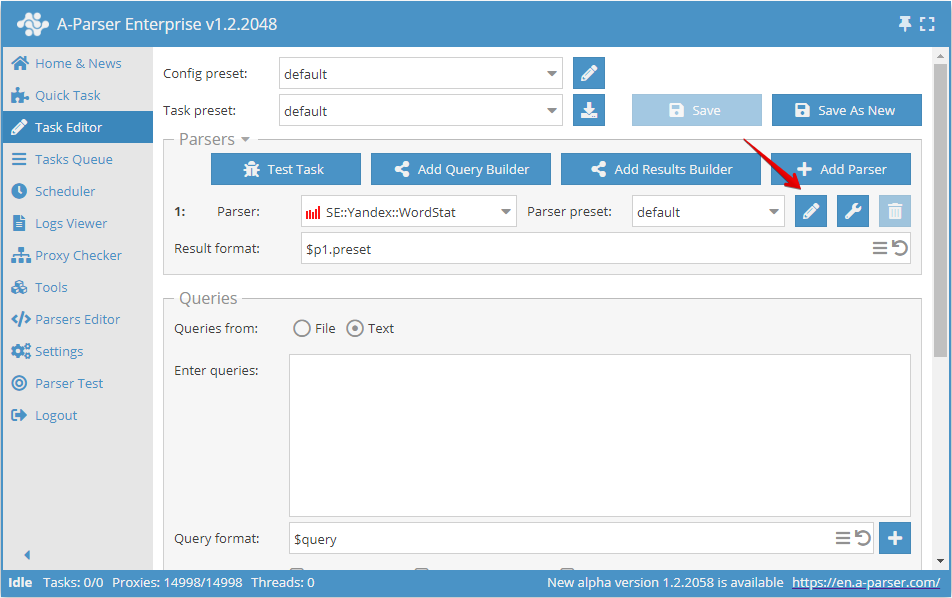
In the settings below, in the AntiGate preset item, select our previously created preset (in the example, it was named My Work Captcha Solver).
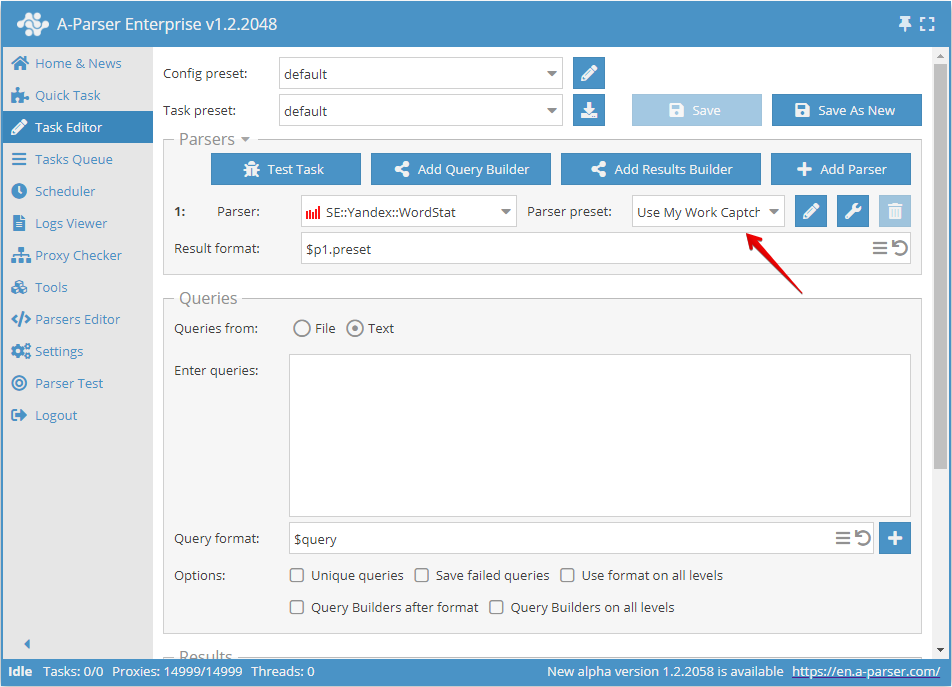
Save everything as a new preset (in the example, it is named Use My Work Captcha Solver).
The final step is to return to the Task Editor and select the last created preset with the configured AntiGate (in the example it was named Use My Work Captcha Solver) for the SE::Yandex::WordStat parser.
Solving services
RuCaptcha
RuCaptcha supports the following captcha types:
- Click CAPTCHA
- Rotate CAPTCHA
- reCAPTCHA (v2/v3/Invisible/Enterprise)
- KeyCAPTCHA
- Capy Puzzle CAPTCHA
- Cloudflare Turnstile
- Amazon CAPTCHA
- Audio CAPTCHA
- Arkose Labs CAPTCHA
- MTCaptcha
- DataDome CAPTCHA
- CyberSiARA CAPTCHA
- Yandex CAPTCHA
- VK CAPTCHA
Anti-Captcha
Anti-Captcha supports the following captcha types:
- Recaptcha V2
- Recaptcha V3
- FunCaptcha
- GeeTest
- Hcaptcha
- Turnstile
2captcha
2captcha supports the following captcha types:
- Click CAPTCHA
- Rotate CAPTCHA
- reCAPTCHA V2
- reCAPTCHA V3
- KeyCAPTCHA
- GeeTest CAPTCHA
- hCaptcha
- FunCaptcha
- Capy Puzzle CAPTCHA
- Lemin CAPTCHA
- Cloudflare Turnstile
- Audio CAPTCHA
- Arkose Labs CAPTCHA
- Amazon CAPTCHA
- MTCaptcha
- DataDome CAPTCHA
- CyberSiARA CAPTCHA
CapMonster
CapMonster supports the following captcha types:
- reCAPTCHA (v2, invisible, v3)
- etc.
CapMonster cloud
CapMonster cloud supports the following captcha types:
- reCAPTCHA v2
- reCAPTCHA v3
- reCAPTCHA Enterprise
- hCaptcha
- hCaptcha Enterprise
- FunCaptcha
- GeeTest
- Cloudflare Turnstile
- Cloudflare Bot Challenge
- Yandex SmartCaptcha
CapSolver
CapSolver supports the following captcha types:
- reCAPTCHA (v2/v3/Enterprise)
- FunCaptcha
- DataDome
- Anti-bot Solution
- hCaptcha (Normal/Enterprise)
- Geetest v3 / v4
captchas.io
captchas.io supports the following captcha types:
- reCAPTCHA (v2/v3/Invisible/Enterprise)
- Image CAPTCHA
- FunCAPTCHA
- GeeTest
- hCAPTCHA
- Cloudflare Turnstile
- Audio and Text CAPTCHAs
Cap.guru
Cap.guru supports the following captcha types:
- reCAPTCHA (v2/v3/Invisible)
- hCaptcha
- SmartCaptcha
- FunCaptcha
- ReCaptcha
- hCaptcha
- GeeTest
- Binance
- TikTok
- Amazon
White captcha
White captcha supports the following captcha types:
- SmartCaptcha from Yandex
Capsola
Capsola supports the following captcha types:
- SmartCaptcha click
Nextcaptcha
Nextcaptcha supports the following captcha types:
- ReCaptchaV2TaskProxyLess
- ReCaptchaV2EnterpriseTask
- ReCaptchaV2EnterpriseTaskProxyLess
- ReCaptchaV2HSEnterpriseTaskProxyLess
- ReCaptchaV3Task
- ReCaptchaV3HSTaskProxyLess
- ReCaptchaV3TaskProxyLess
- ReCaptchaMobileTask
- ReCaptchaMobileProxyLess
Using XEvil
⏩ Configuration video
Video showing the use of XEvil together with A-Parser to solve Util::ReCaptcha2:
The video shows:
- connecting XEvil to A-Parser to work with Util::ReCaptcha2
- verifying and demonstrating operation in
 SE::Google::Modern
Selecting the desired neural network
Starting from XEvil 6.0 [Beta-10], support for the corename parameter has been added, through which you can specify the desired neural network when sending regular captchas (images). More details here.
You can pass this parameter using the Query string addition field of the Util::AntiGate scraper. For example, for the Default v.1 neural network, you need to enter corename=Default v.1 in this field.